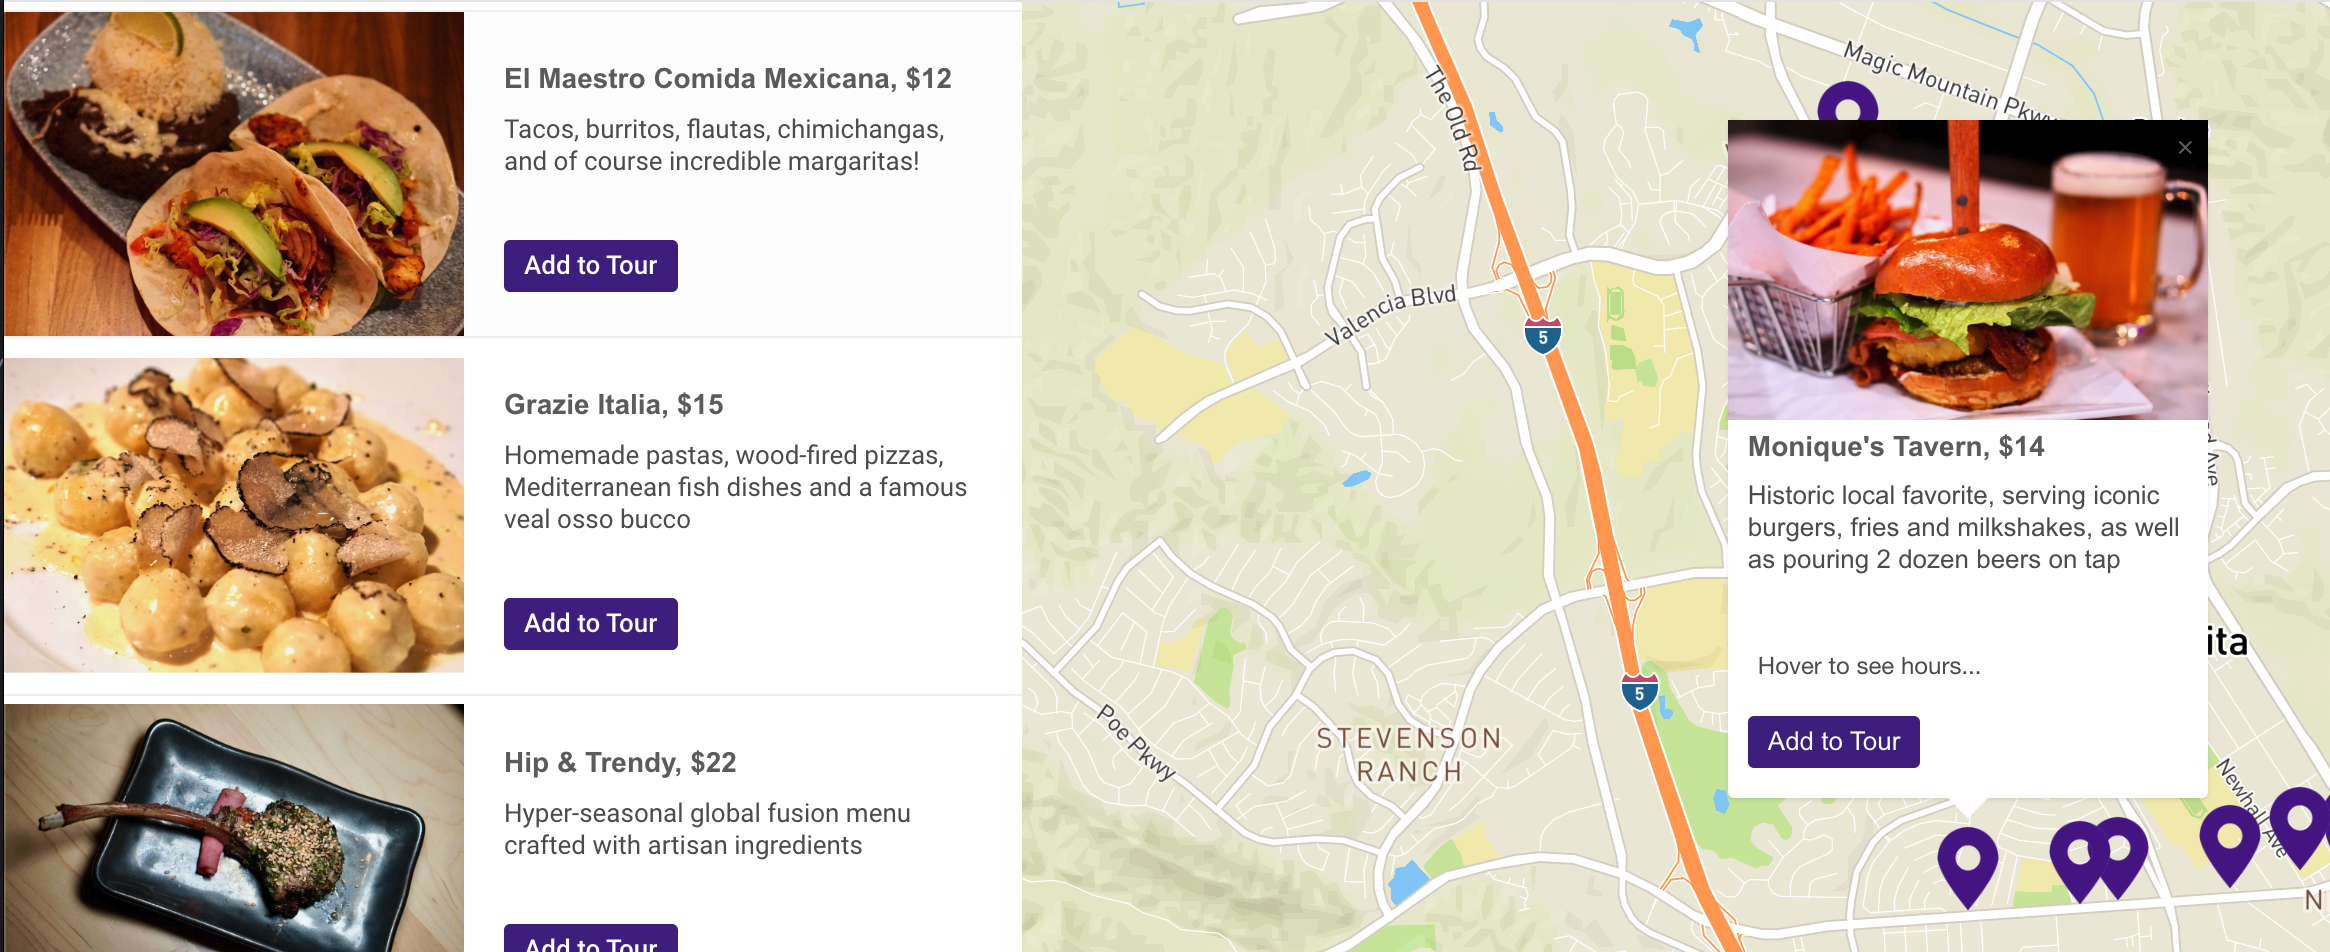
If you'd like to add images to go along with your locations in Storepoint, this tutorial will show you how to get set up. The end result will look something like the below screenshot - of course, the sizing and styling can be customized to match your design once your images are added. Simply contact us at hello@storepoint.co if you need any specific adjustments.

1. Where are your images?
- If your images are currently used on your website, please go to point 2.
- If your images aren't on your website yet but rather on a folder on your computer for example, please go to point 3.
2. Adding an image from your website
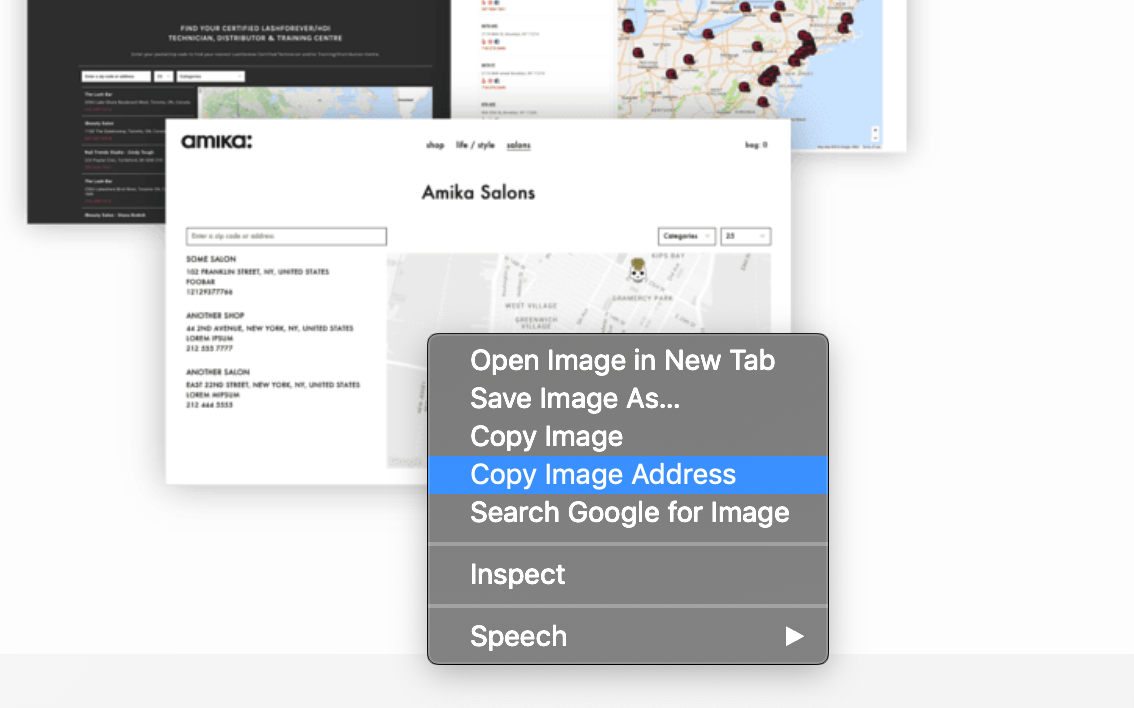
If an image you're looking to add is already on your website or hosted online, simply right click on the image and click "copy image address" to get the image address.

You can then paste the copied image address into the "Image" field in the Storepoint dashboard or paste it into the "image_url" column in your spreadsheet if you're using bulk upload or Google Sheets sync.
3. Adding an image that isn't hosted online
If your image or images aren't on your website or hosted publicly online, we'll upload them to Google drive: https://drive.google.com/ you can alternatively use an image hosting service like https://cloudinary.com/
- Upload to Google Drive
Create a folder for your images in Google Drive and upload them/drag and drop your images into it.
- Get the Image shareable link
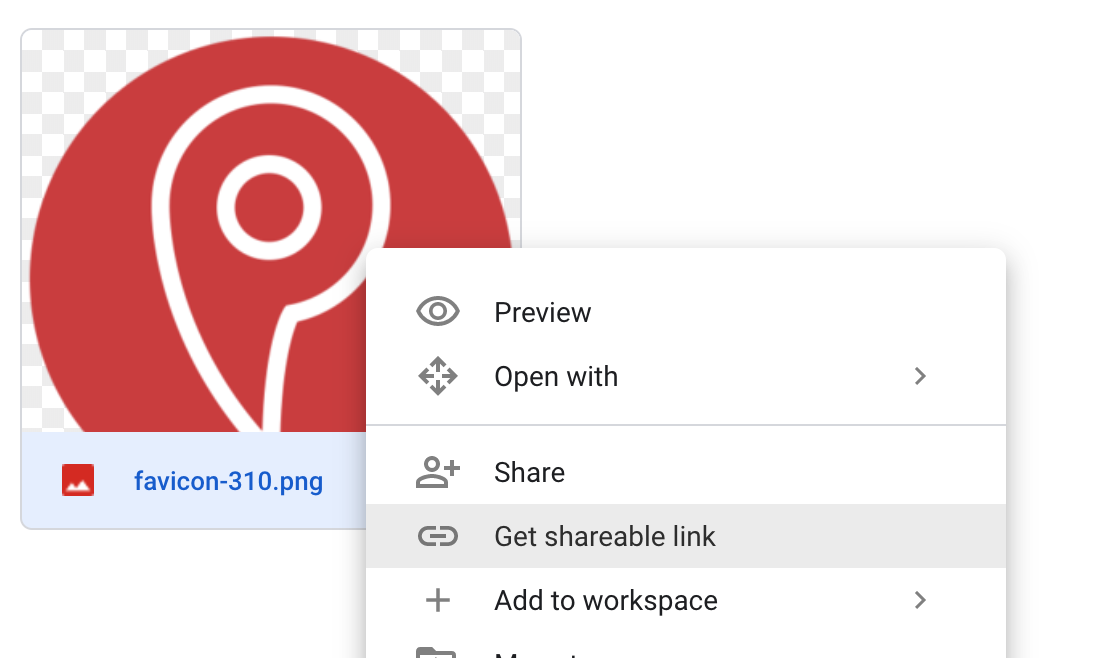
In your google drive folder, click on your uploaded image and click "Get shareable link".

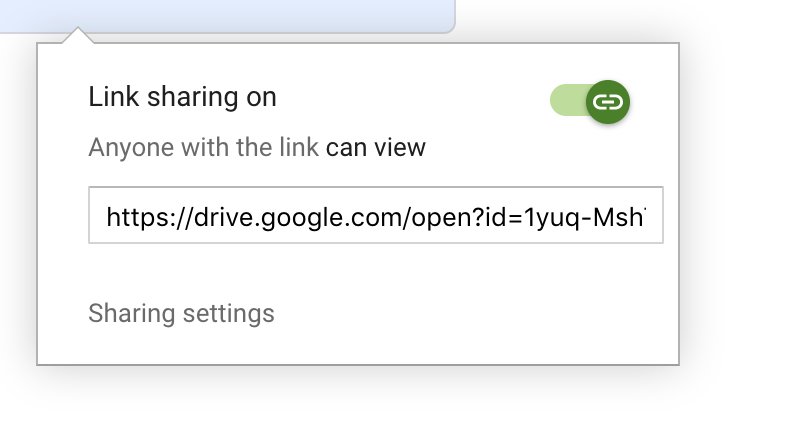
Then, make sure to turn on link sharing and copy the share url. The permissions must say "anyone with the link can view". Contact us for help if they don't.

Now, simply paste the share url into the "Image" field in the Storepoint dashboard or paste it into the "image_url" column in your spreadsheet if you're using bulk upload or Google Sheets sync.
4. Done!
Have questions or need adjustments to the layout of images on your locator? Get in touch with us at hello@storepoint.co
Thanks!

Comments
0 comments
Please sign in to leave a comment.